
Combine Kitchen and Dining: Your Renovation Guide


A combined kitchen and dining renovation is defined as the structural and design process of merging separate cooking and eating spaces into one unified, functional area. This approach, often called an open-plan kitchen-diner in architectural practice, improves household flow, encourages social interaction, and consistently adds resale value to Melbourne homes. The right renovation considers ergonomic clearances, structural realities, and your actual lifestyle before a single wall comes down. We at Yorcon have guided homeowners through this process for nearly 20 years, and the results speak for themselves: a well-executed kitchen-diner feels larger, works harder, and genuinely changes how a family lives.
What are the key planning steps for a kitchen-dining renovation?
Planning is where most kitchen-dining renovations succeed or fail. Before you choose a paint color or pick a pendant light, you need a clear picture of what your existing space can actually support.
The first question is structural. Walls separating kitchens from dining rooms are often load-bearing, and removing them without proper assessment creates serious safety risks. A structural consultation typically costs $500–$1,500, and building permits add another $400–$1,500 depending on the scope of work. That upfront investment protects you from costly surprises mid-build.

Natural light and ceiling height shape the feel of the finished space more than most homeowners expect. Spatial proportion and lighting are more critical than trends for creating a kitchen-diner that works long-term. A room with low ceilings and one north-facing window will respond very differently to an open layout than a generous Victorian terrace with high ceilings and dual aspects.
Your lifestyle deserves honest scrutiny here. Open concept layouts suit families who entertain frequently, but they come with real trade-offs: cooking smells travel freely, noise carries across the space, and privacy disappears. Ask yourself whether you cook with the TV on, whether teenagers do homework at the kitchen table, and whether you host dinner parties regularly. The answers should drive your layout decision.
Check these infrastructure factors before finalizing your scope:
HVAC: Ductwork often runs through the walls you want to remove. Rerouting it adds cost and time.
Electrical: Circuits serving the kitchen may need upgrading when the layout changes.
Plumbing: Relocating a sink or dishwasher is possible but expensive.
Clearances: Minimum walkway width is 36 inches, with 42 inches required behind seating. The kitchen work triangle should not exceed 9 feet per side.
Pro Tip: Before engaging a builder, walk your space with a tape measure and mark the 36-inch clearance lines on the floor with painter’s tape. You will immediately see whether your proposed layout is workable or just wishful thinking.
How do you design a cohesive layout for a combined kitchen and dining area?
A cohesive kitchen-diner does not happen by accident. It requires deliberate decisions about layout, materials, and lighting that treat both zones as one room, not two rooms with a wall removed.
Choosing the right layout
Three layouts work reliably in combined kitchen-dining spaces. An island layout places a freestanding counter between the kitchen and dining area, creating a natural boundary without blocking sightlines. A peninsula layout achieves the same result using a counter attached to one wall, which suits narrower rooms. An open-flow layout removes all physical division and relies entirely on furniture placement and lighting to define zones. Each option suits different room proportions, so review your floor plan carefully before committing.
Creating visual unity
Consistent materials are the fastest way to make two zones read as one room. Use the same flooring throughout rather than switching from tile to timber at the old wall line. Match cabinetry profiles and trim details between the kitchen and any built-in dining storage. Keep your color palette consistent across both zones. Consistent flooring and trim profiles visually bind kitchen and dining areas in a way that no amount of styling can replicate after the fact.
Lighting does the heavy lifting for zone definition. Pendant lights over a dining table signal “this is where we eat” without building a wall. Under-cabinet task lighting in the kitchen keeps that zone functional. A dimmer on the dining pendants lets you shift the mood from weeknight dinner to weekend entertaining with one gesture.
Handling storage and acoustics
Open kitchens expose every shelf and drawer to the dining area. Concealed storage prevents the clinical, overworked look that makes open kitchens feel chaotic rather than welcoming. Walk-in pantries, utility rooms, or tall cabinetry with closed doors all serve this purpose. For small kitchen dining solutions, vertical storage on underused wall space recovers significant capacity without eating into floor area.
Acoustics are frequently overlooked. Hard surfaces reflect sound, and an open kitchen-diner full of tile, stone, and glass can become uncomfortably loud. Rugs under the dining table, upholstered chairs, and curtains all absorb sound and make conversation easier.
Pro Tip: Choose your flooring before finalizing your cabinetry order. The floor is the single material that runs through both zones, and getting it wrong is expensive to fix. Bring flooring samples to your cabinetry showroom, not the other way around.
Step-by-step guide to executing your kitchen-dining renovation
A clear sequence prevents costly rework. Follow these steps in order.
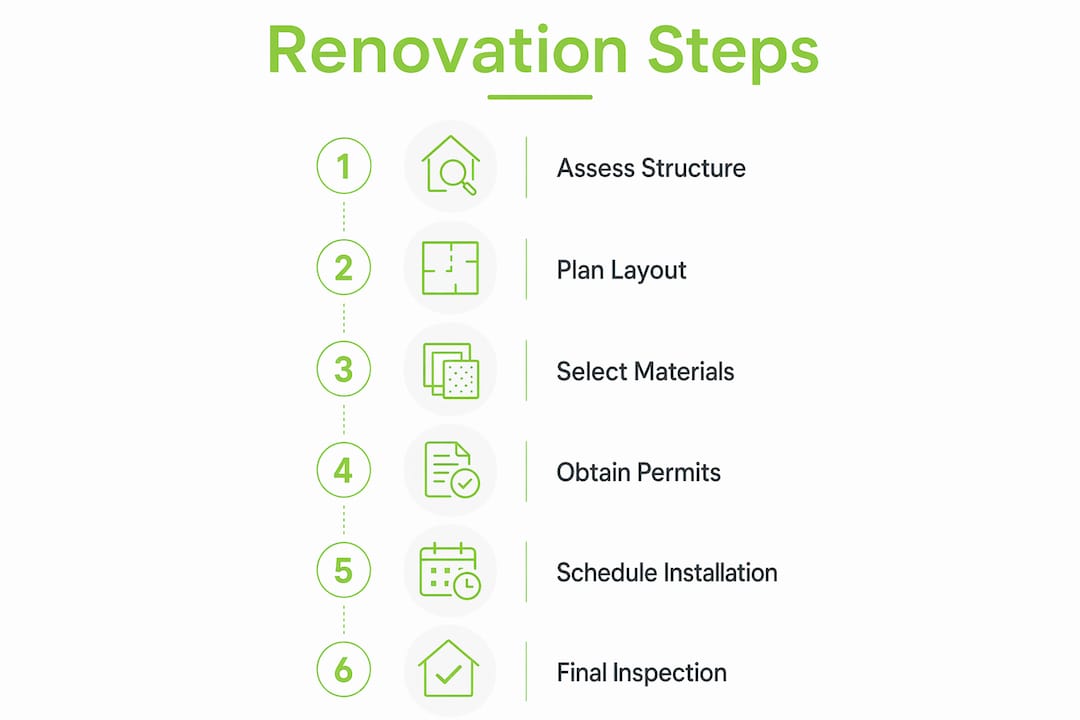
Obtain permits and engage a structural engineer. Submit your plans to your local council before any demolition begins. A structural engineer must assess any wall you plan to remove and specify the beam required to carry the load above.
Complete demolition. Remove the wall or create the opening once permits are approved and your engineer has signed off. This is also the moment to expose existing ductwork, wiring, and plumbing for assessment.
Address mechanical systems. HVAC and electrical relocation often dominates renovation complexity after structural changes. Reroute ductwork, upgrade circuits, and relocate any plumbing before closing walls.
Install structural elements. Fit the beam, posts, and any new framing. This is the skeleton your finished space hangs on, so precision here matters.
Rough-in plumbing and electrical. Run new circuits, install junction boxes, and rough-in any relocated plumbing before plastering.
Plaster and paint. Close walls, skim, and paint before cabinetry arrives. Painting an empty room is faster and cleaner than working around installed joinery.
Install flooring. Lay flooring across the full combined area in one run to avoid visible joins at the old wall line.
Fit cabinetry and appliances. Install kitchen cabinetry, benchtops, and appliances in sequence. Connect plumbing and electrical at this stage.
Layer lighting. Install pendant lights, under-cabinet lighting, and any recessed ceiling fixtures. Connect dimmers where specified.
Final staging. Place dining furniture, add rugs and soft furnishings for acoustic comfort, and arrange decor. Step back and assess flow by walking the space as you would during a normal meal preparation.
Pro Tip: Schedule your flooring installation before cabinetry delivery, not after. Cabinets installed on top of finished flooring are easier to replace in the future and the finished result looks cleaner at the toe-kick line.
The table below summarizes typical timing for each phase.
Phase | Typical Duration |
Permits and engineering | 2–6 weeks |
Demolition | 1–3 days |
Mechanical rerouting | 1–2 weeks |
Structural framing | 3–5 days |
Plastering and painting | 1–2 weeks |
Flooring and cabinetry | 1–3 weeks |
Lighting and final fit-out | 3–7 days |
How much does combining a kitchen and dining area cost?
Cost ranges for this type of renovation vary significantly based on structural complexity. Removing a non-load-bearing wall costs $1,500–$5,000, while a full multi-wall kitchen integration can reach $20,000–$50,000 or more. That range reflects the difference between a simple opening and a complete reconfiguration of mechanical systems, flooring, and cabinetry.
A practical budget framework allocates funds across four categories. Budget recommendations suggest 40% to visual upgrades, 30% to functional items, 20% to DIY materials, and 10% to contingency. The contingency is not optional. Unexpected costs from HVAC, electrical, and plumbing exposure are common once walls open up, and a 10% buffer prevents those surprises from stalling your project.
Cost-saving strategies that actually work:
Paint existing cabinetry rather than replacing it. The visual impact is comparable to new cabinetry at a fraction of the cost.
Replace hardware only. New handles and hinges on painted cabinets can transform a kitchen for under $500.
Use peel-and-stick backsplash tiles in low-moisture areas for a quick visual refresh.
Repurpose existing dining furniture rather than buying new. A reupholstered chair costs far less than a replacement.
Maximize vertical storage with open shelving on unused wall space, which costs less than built-in cabinetry and adds visual interest.
For homeowners weighing the full financial picture, it helps to understand whether renovating or rebuilding makes more sense for your specific situation before committing to a scope.
Pro Tip: Get three quotes for any structural work and ask each builder to itemize mechanical rerouting separately. That line item is where budgets blow out most often, and seeing it isolated helps you make informed trade-offs.
Key Takeaways
A successful kitchen-dining renovation requires structural assessment, cohesive material choices, and honest lifestyle planning before demolition begins.
Point | Details |
Structural assessment first | Confirm load-bearing status and get permits before any wall removal begins. |
Clearances are non-negotiable | Maintain 36-inch walkways and 42 inches behind seating for safe, functional flow. |
Materials unify the space | Consistent flooring and trim across both zones make the combined area feel intentional. |
Budget for the unexpected | Allocate 10% contingency specifically for mechanical rerouting exposed during demolition. |
Lifestyle drives layout | Assess noise tolerance and entertaining habits honestly before committing to a fully open plan. |
What I’ve learned after nearly two decades of kitchen-dining renovations
The homeowners who regret their kitchen-dining renovations almost always skipped one of two things: an honest lifestyle assessment or a proper mechanical review. I have seen beautiful open-plan kitchens where the family retreats to the back bedroom to watch TV because the noise from the kitchen is unbearable. I have also seen budgets collapse when a wall came down and revealed three ductwork runs that needed full rerouting.
My strongest advice is to try a wide cased opening or half-wall before committing to full demolition. It sounds counterintuitive when you are excited about the finished vision, but living with a large opening for a few weeks tells you more about noise, smell, and privacy than any floor plan can. Full wall removal is permanent and structurally costly. A half-wall costs a fraction of that and gives you real data.
The other thing I see homeowners underestimate is acoustic comfort. A kitchen-diner full of stone benchtops, glass splashbacks, and polished concrete floors is a beautiful photograph and a difficult room to have a conversation in. Rugs, upholstered seating, and curtains are not just decorative. They are functional acoustic tools, and they belong in the design brief from day one, not as an afterthought once the room feels too loud.
Finally, resist the urge to treat the two zones as separate design projects. The most disjointed kitchen-diners I have seen are the ones where the homeowner chose kitchen materials with a kitchen designer and dining furniture with an interior stylist, and the two never spoke to each other. One consistent design language, applied across both zones, is what separates a renovation that photographs well from one that actually feels like a home.
— Matthew
How Yorcon approaches kitchen and dining renovations in Melbourne
Yorcon’s home renovation services cover the full scope of combining kitchen and dining areas, from structural engineering coordination and permit management through to cabinetry installation and final staging. We handle the complexity so you do not have to coordinate between a structural engineer, a builder, an electrician, and a plumber separately.
Our design-and-build approach means your layout, materials, and mechanical systems are planned together from the start, not retrofitted to each other mid-project. If you are considering a home extension that incorporates a new kitchen-dining area, or a full renovation of your existing footprint, we would welcome a conversation about what your home can become. Reach out to the Yorcon team for a consultation tailored to your Melbourne home.
FAQ
How much does it cost to combine a kitchen and dining room?
Removing a non-load-bearing wall costs $1,500–$5,000, while a full kitchen-dining integration can reach $20,000–$50,000 or more depending on structural and mechanical complexity. Always budget a 10% contingency for unexpected costs.
Do I need a permit to remove a wall between my kitchen and dining room?
Yes, in most Australian jurisdictions you need a building permit for wall removal, particularly if the wall is load-bearing. Permits typically cost $400–$1,500 and require a structural engineer’s assessment.
What is the minimum clearance needed in a combined kitchen-dining space?
Walkways require a minimum of 36 inches of clearance, and the space behind seating needs at least 42 inches. The kitchen work triangle should not exceed 9 feet per side for efficient flow.
Is open-plan right for every household?
Open-plan layouts work best for households that entertain frequently and tolerate shared noise. Families who value privacy or have young children doing homework near the kitchen often find a partial opening or half-wall a better fit.
How do I make a small kitchen-dining area feel larger?
Use consistent flooring across both zones, maximize vertical storage with tall cabinetry, and choose pendant lighting over bulky ceiling fixtures. Mirrors and light paint colors on walls also increase the perceived depth of a compact space.
Recommended


