
What Is a Phased Renovation? Your Practical Guide
- Yorgo

- 21 hours ago
- 11 min read

A phased renovation is a planned, multi-stage remodel where a whole-home project is broken into distinct stages completed over months or years, each following a single master plan. It suits homeowners who need to spread cost, stay in the home during construction, or make high-impact improvements before tackling the rest of the house.
The core aims are straightforward: control cashflow, limit disruption at any one time, and allow staged decision-making without losing design cohesion. Think of it as building your finished home in chapters, not all at once.
Choose a phased approach when:
Your budget doesn’t cover the full scope right now, but you have a clear long-term vision
You need to stay in the home during construction and can’t vacate entirely
You want to deliver one high-impact area (kitchen, main living zone, deck) quickly while planning the rest
A single-stage renovation is usually better when:
You can vacate the property and want to minimize total disruption time
Design cohesion is the top priority and you’re concerned about style drift between stages
Your budget is ready and a single mobilization will save money overall
Table of Contents
What are the real benefits of renovating in phases?
The most immediate gain is cashflow control. Rather than financing an entire whole-home project upfront, you fund each stage as your savings or borrowing capacity allows. Under current interest-rate conditions, that breathing room matters. A phased renovation approach lets you spread financial commitment across time without abandoning the long-term vision.
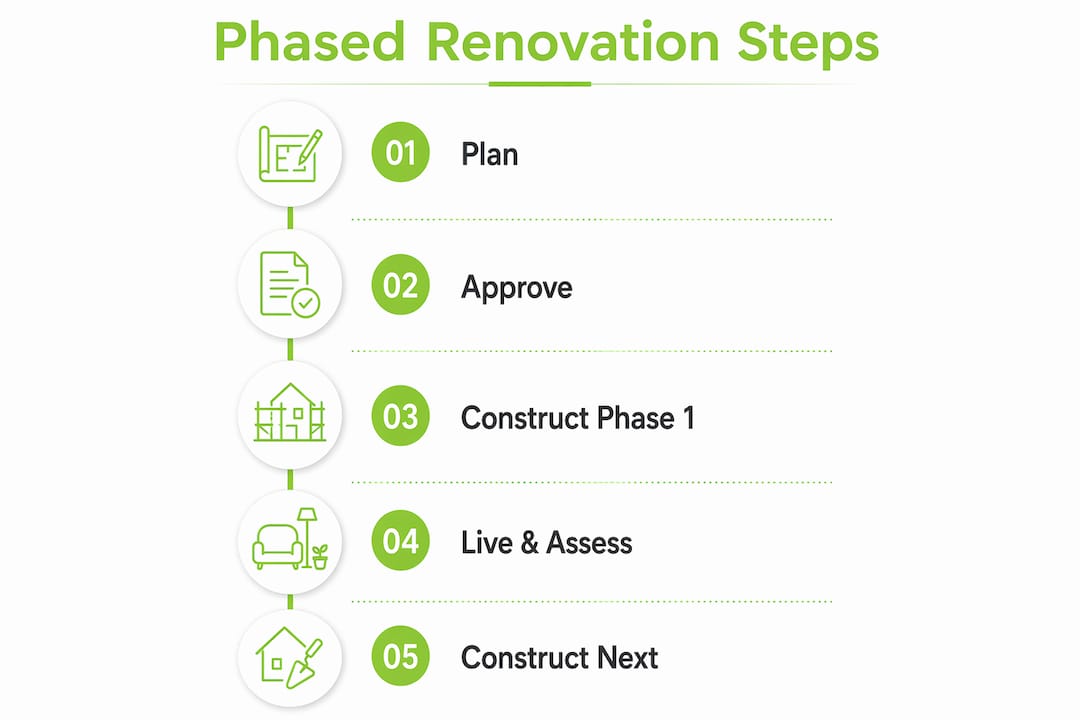
Living in the home during construction is genuinely more manageable when only one zone is under active work. You keep a functioning kitchen while the bathroom is being renovated, or maintain bedrooms while the living extension goes up. That’s not a small thing when you have kids or a demanding work schedule.

There’s also a design benefit that often goes unnoticed. Completing an early phase and living with it for six months gives you real feedback before you commit to finishes in later rooms. You might discover the open-plan layout you planned for the rear extension needs a small adjustment, or that a particular tile choice works better than you expected. That lived-in perspective is something no mood board can replicate.
Prioritizing high-impact improvements first also means your daily life improves sooner. A new kitchen or a functional outdoor entertaining area changes how you use your home from day one, even if the bedrooms aren’t touched for another two years. From a resale perspective, visible improvements delivered early can protect and lift your property’s value incrementally rather than waiting for a single big reveal.
Key benefits at a glance:
Spread financial commitment across multiple budget cycles
Maintain livable sections of the home during active construction
Refine later design choices after seeing earlier phases in real life
Deliver lifestyle-changing improvements (kitchen, living zone, deck) early
Build equity incrementally with visible improvements at each stage
Pro Tip: Ask your builder to identify which phase will have the biggest impact on your daily life and tackle that one first. A better kitchen or a functional bathroom often makes the rest of the program feel worthwhile.
Honest downsides: what phased renovations actually cost you
The total program time is almost always longer than a single-stage build. Each phase requires its own mobilization, site setup, and close-out, and the gaps between phases add up. If you’re planning three stages over four years, you’re living with some level of ongoing disruption for most of that period.
Total cost is typically higher too. Every time a builder returns to site, there are remobilization costs: setting up scaffolding again, re-establishing temporary services, re-engaging subcontractors. Material prices also tend to rise between phases, and trade availability can shift. A staged approach costs slightly more than a single build overall, even though it distributes the financial burden more comfortably.
Without a master plan locked in from the start, style drift is a real risk. Finishes chosen in Phase 1 may feel dated or mismatched by the time Phase 3 begins. Worse, structural or service decisions made early can physically block what you want to do later, forcing destructive rework that wipes out earlier savings.
The biggest trap we see is homeowners treating each phase as a separate project. Without a single coordinated plan, you end up reopening finished walls, relocating pipes that were run the wrong way, and paying twice for work that should have been done once. A master plan isn’t optional — it’s the whole point.
How to mitigate the main risks:
Lock in a master plan with your architect before Phase 1 begins, covering all intended phases
Set a program-level contingency (separate from each phase’s contingency) to cover inflation and remobilization
Choose a builder who prices phased work transparently, including remobilization costs per stage
Agree on a style guide or material palette upfront to prevent finish inconsistencies across phases
How to plan a phased renovation step by step
Good phased renovation planning starts well before a single wall comes down. The sequence below is what we at Yorcon walk clients through, and it’s the difference between a program that builds on itself and one that creates expensive problems later.
The planning sequence
Define your long-term vision first. Before thinking about phases, map the complete finished home. What does the house look like when every stage is done? This master plan is the document everything else references.
Set goals and prioritize by lifestyle impact and technical order. Which spaces matter most to your daily life? Which structural or service works must happen before anything else? Structural changes and services (electrical, plumbing, HVAC) always come before finishes. A clear sequencing order runs: demolition and structural, then services, then internal construction and finishes.
Develop a staged budget. Each phase needs its own budget with a 10–15% contingency. On top of that, hold a separate program-level contingency for inflation and remobilization between stages. Renovation project management guidance consistently flags that timelines undercount planning and approval time, so build that in too.
Engage an architect or designer early. Produce the full design before Phase 1 starts, even if later phases won’t be built for years. This is what allows early rough-ins to be positioned correctly for future work.
Lock in long-lead items early. Windows, structural steel, and custom joinery can have long lead times. Ordering these ahead of their phase avoids delays that push your whole program out.
Factor in approvals for every phase. Building permits and council approvals take time. Each phase may need its own permit, and you can’t assume approval from Phase 1 carries over.
Select your builder and agree on phased pricing. Get a clear breakdown of costs per phase, including remobilization fees, so there are no surprises when Phase 2 begins.
Launch Phase 1 with a clear site brief. Confirm site access, temporary services, safety provisions, and a communication schedule with your builder before work starts.
Pre-Phase 1 checklist:
Master plan signed off by architect
Phase 1 budget confirmed with contingency
Building permit in hand
Long-lead items ordered
Temporary services (kitchen, bathroom) planned if living in during works
Communication schedule agreed with builder (weekly updates minimum)
Pro Tip: When running services in Phase 1, always rough-in conduits, pipes, and cable runs for future phases at the same time. Opening a finished wall later to add a power point or a drain costs far more than routing the conduit while the wall is already open.
What to expect for timelines and costs in Australian projects
Australian phased renovations carry approval and planning lead times that many homeowners underestimate. Design, engineering, and council processing typically add several weeks to each phase before a single tool touches the site. Factor that into every stage schedule from the beginning.
Typical on-site durations for common phase types:
Single room (bathroom, laundry): a few weeks on site
Kitchen renovation: several weeks on site
Rear extension or addition: several months on site
Whole-house multi-phase program: can span multiple years total program time across all stages
These are construction durations only. Add design, documentation, and approval time before each phase starts.
Phase type | Design and approval | On-site construction | Typical total per phase |
Single room (bathroom/laundry) | several weeks | several weeks | a few months |
Kitchen renovation | several weeks | several weeks | several months |
Rear extension | a few months | several months | several months |
Whole-house stage | several months | several months | around a year or more |
Costs tend to rise between phases for two reasons. First, remobilization: each time a builder returns to site, there are setup costs that wouldn’t exist in a continuous build. Second, material prices and trade rates generally increase over time. A project priced in 2024 for Phase 2 work in 2026 will likely cost more than the original estimate. Building a per-phase contingency of 10–15% and a separate program-level buffer for inflation is not overcautious. It’s just realistic.
Builder best practice: sequencing and future-proofing your home
The rule that experienced builders follow without exception: structural and service work always comes before fitout and finishes. Completing a beautiful kitchen splashback and then discovering the plumbing for the upstairs bathroom needs to run through that same wall is an expensive lesson. Architects recommend producing a long-term design first, then sequencing it into buildable stages so early work builds directly into later phases.
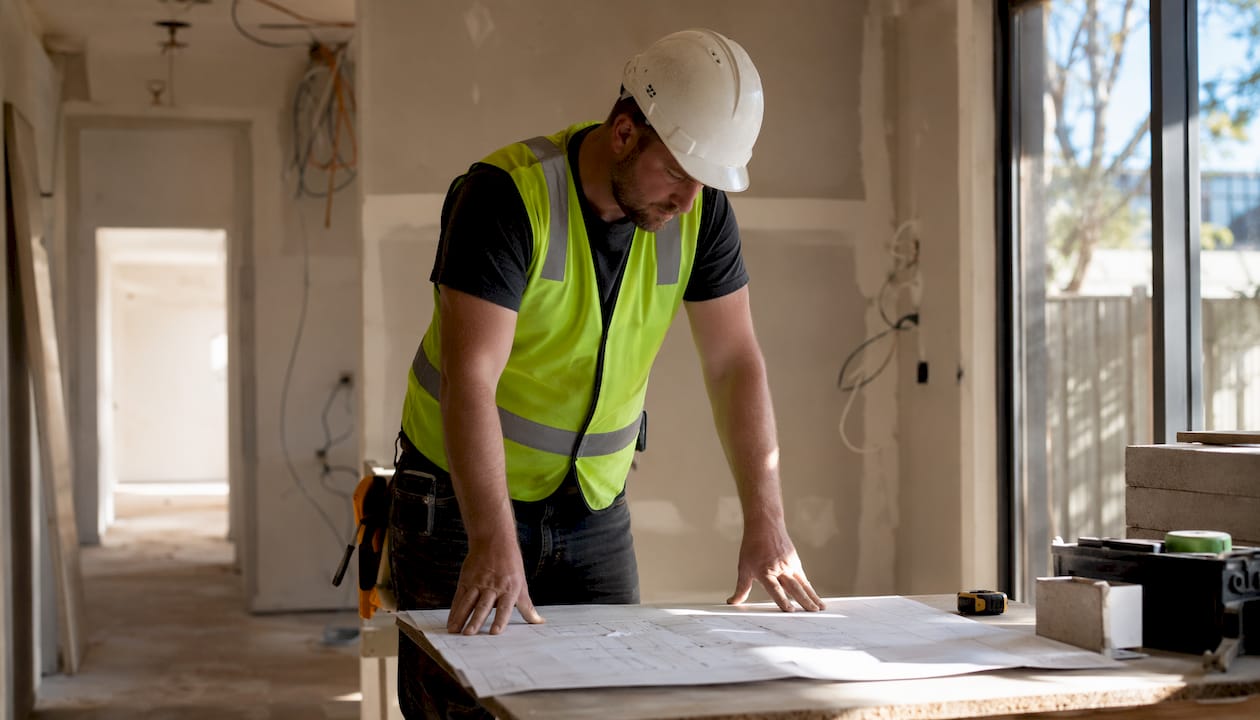
Structural renovation work — footings, beams, load-bearing walls — must be resolved before anything else. Once structure is locked in, services follow: electrical rough-ins, plumbing, and HVAC ductwork. Only then do internal linings, joinery, and finishes make sense.
Future-proofing rough-ins is where phased projects either succeed or fail. If you’re building a ground-floor extension in Phase 1 and plan a first-floor addition in Phase 3, the structural engineer needs to design the Phase 1 footings and frame to carry that future load. Electrical conduits for Phase 3 circuits should be run through Phase 1 walls while they’re open. The same logic applies to plumbing waste lines and HVAC ductwork.
In a staged Melbourne renovation we managed, the homeowners wanted to add a first-floor master suite in Phase 3. Because we designed the Phase 1 rear extension footings and frame to carry that future load, Phase 3 required no demolition of earlier work. The rough-ins were already in the wall. That single decision saved the equivalent of a full phase’s worth of rework.
Pro Tip: Ask your structural engineer to design Phase 1 foundations and framing to accommodate all future phases from day one. The marginal cost at the time is small. The cost of retrofitting later is not.
Permits, council approvals, and what to expect in Australia
Approvals are a critical path item in every phase. Treating them as something to sort out later is one of the most common reasons phased programs blow out in time. Each phase may require its own building permit, and some works also need a planning permit or Development Application depending on your council and the scope of work.
Common approvals and who issues them:
Building permit: Issued by a registered building surveyor (private or council). Required for most structural works, extensions, and significant alterations.
Planning permit / Development Application (DA): Required for works that affect the site’s footprint, height, or heritage overlay. Processed by your local council.
CDC (Complying Development Certificate): Available in some states as a faster approval pathway for works that meet pre-set standards, bypassing full council DA.
Typical lead times to factor into each phase:
Concept design and documentation: 4–12 weeks
Engineering reports and specifications: 2–6 weeks
Building permit (private surveyor): 2–4 weeks
Council DA or planning permit: 8–20 weeks (varies significantly by council and complexity)
For heritage homes in Melbourne, heritage overlay approvals add another layer and can extend planning timelines considerably.
Documents commonly required before construction starts:
Architectural drawings (stamped and documented)
Structural engineering plans
Energy efficiency report (NatHERS or similar)
Soil report (for new footings)
Certificate of title and site survey
Any heritage impact statement (where applicable)
Numbered checklist for approval coordination across phases:
Confirm with your builder and architect which approvals apply to each phase before design begins
Start the design and documentation process for Phase 2 while Phase 1 is under construction
Lodge permit applications as early as possible — never wait until Phase 1 is complete
Coordinate your building surveyor across all phases so they understand the full program
Check whether a single building permit can cover multiple phases or whether separate permits are needed for each
The family home renovation process involves council approval, design, and engineering timelines that stack up quickly. Starting approvals early is the single most effective way to keep phase transitions on schedule.
Is a phased renovation right for your household?
Not every home or household suits a phased approach. Use these questions to work out which path fits your situation.
Ask yourself:
Can you fund the full renovation now, or do you need to spread cost across 2–4 years?
Are you able to vacate the property during construction, or do you need to stay in the home?
How tolerant is your household of ongoing, low-level disruption over a multi-year program?
Do you have a clear long-term vision, or are you still working out what you want?
Is design cohesion across the whole home a top priority for you?
A phased approach suits you when:
Budget needs to be spread across multiple years
You’re staying in the home and need livable sections maintained
You have a clear master plan and can commit to it now
High-impact improvements (kitchen, living zone, extension) can be delivered in Phase 1
A single-stage renovation is likely better when:
You can vacate and want to minimize total disruption time
Your full budget is available and a single mobilization saves money
Design cohesion is paramount and you’re concerned about style drift
Next steps if you’re choosing a phased approach:
Commission a full architectural master plan before committing to Phase 1
Ask builders for phased pricing that includes remobilization costs per stage
Confirm your permit strategy with your building surveyor before design begins
Brief your architect on the full intended program, not just Phase 1
When briefing your architect or builder, be explicit: share the full long-term vision, the intended number of phases, your rough budget for each, and your timeline. A builder who only knows about Phase 1 cannot future-proof the work for Phase 3.
Key Takeaways
A phased renovation works best when it follows a single master plan from day one, with structural and service work sequenced before finishes and approval lead times built into every phase schedule.
Point | Details |
Master plan is non-negotiable | Design the full home before Phase 1 starts to prevent costly rework in later stages. |
Sequence structure and services first | Structural, electrical, plumbing, and HVAC work must precede all finishes and fitout. |
Budget for remobilization and inflation | Hold a per-phase contingency of 10–15% plus a separate program-level buffer for price rises between stages. |
Start approvals early in every phase | Council and permit lead times add weeks to each stage; never treat approvals as an afterthought. |
Yorcon plans and delivers phased programs | With nearly 20 years of Melbourne experience, Yorcon manages master planning, approvals, and phased construction under one roof. |
What most homeowners get wrong about phased renovations
The mistake we see most often at Yorcon isn’t choosing to phase a renovation. It’s starting Phase 1 without a complete picture of where the project ends up. Homeowners focus on the first stage, make decisions that feel right for that room, and then discover two years later that the plumbing is in the wrong place for Phase 2 or the structural frame can’t carry the addition they always wanted upstairs.
The second most common mistake is under-budgeting the gaps between phases. Material costs move, trades get booked out, and remobilization fees are real. A homeowner who budgets tightly for Phase 1 and assumes Phase 2 will cost the same is almost always wrong.
My honest advice: treat the master plan as the most important document in the whole program, not just a nice-to-have. Get it right before a single wall comes down. Everything else follows from that.
Yorcon can help you plan and build your phased renovation
Planning a staged renovation in Melbourne is genuinely complex, and the difference between a program that builds on itself and one that creates expensive rework usually comes down to who’s coordinating the master plan from the start.
Yorcon brings nearly 20 years of residential construction experience to phased projects across Melbourne, managing everything from initial master planning and permit coordination through to on-site delivery and final finishes. Whether you’re planning a rear extension as Phase 1 of a whole-home program, or you’re ready to tackle a full multi-stage renovation, the team handles design integration, approval management, and phased budgeting under one roof.
For homeowners considering a staged approach, the right starting point is a conversation about the full vision, not just the first phase. Explore Yorcon’s home renovations in Melbourne or home extensions services to see how a phased program can be structured around your timeline and budget. Get in touch with the Yorcon team to discuss your master plan and get a phased project quote.
Recommended


Comments