
Smart home prewiring: the plan to hand your builder
- Yorgo

- 3 days ago
- 13 min read
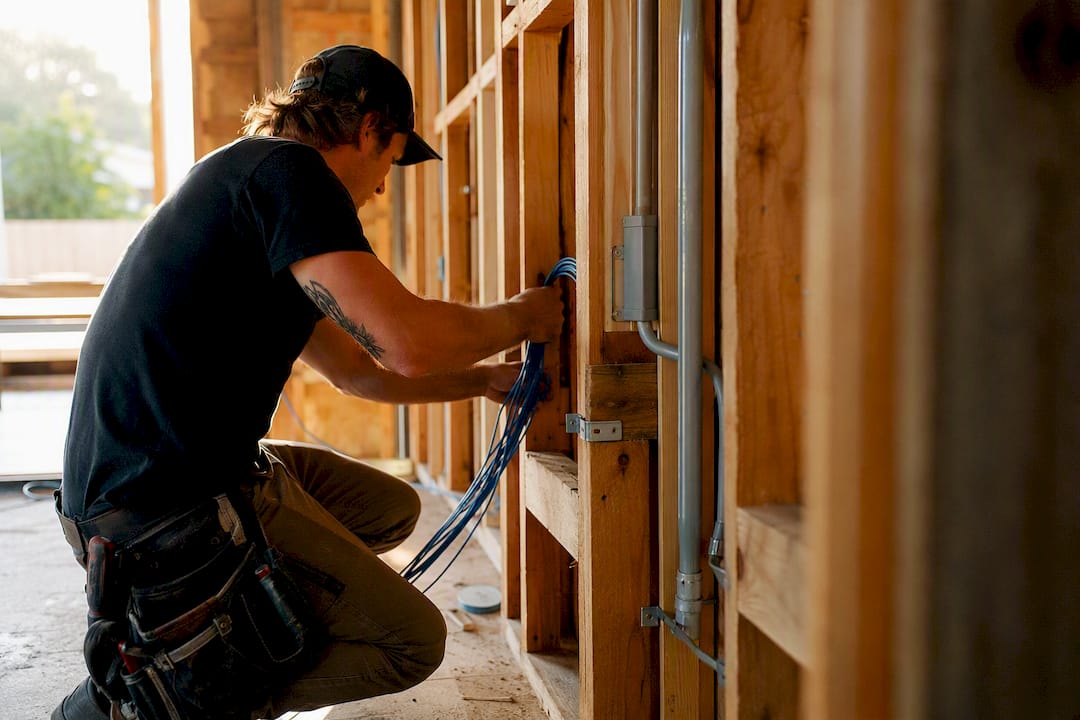
Prewire now, before walls close. Pick a conditioned spot for your comms cabinet, run Cat6A and conduit to every fixed device location, put a neutral wire in every switch box, and label every run before the plasterer arrives. That’s the entire job in one sentence. Everything else in this guide is the detail behind why, and the exact list you can copy straight into an email to your electrician or builder.
Here’s the checklist to send today:
Data drops (2 x Cat6A minimum) to living room, media room, home office, main bedroom, and kitchen
Ceiling Cat6 with PoE to planned Wi-Fi access point (WAP) locations
Cat6 runs to eaves for PoE security cameras, plus one to the front gate or intercom
Speaker cable (14/16 AWG equivalent) to any zoned audio areas
Cat6A plus RG6 coax bundled to every TV wall
Conduit with pull strings run to the attic, exterior perimeter, and switchboard
A conditioned network cabinet location with its own power circuit
Spare empty conduit run to at least two rooms you haven’t planned devices for yet
Mains power and switchboard work is a licensed electrician’s job only. Communications cabling, particularly anything that will connect to the National Broadband Network or carrier services, should be handled or tested by an ACMA-registered cabler. Before drywall goes up, mark every run on the floor plan, book a rough-in inspection with both trades present, and photograph and label each cable at both ends.
Key Takeaways
Prewiring during rough-in with Cat6A, conduit, and a properly located comms cabinet costs a fraction of retrofitting the same scope after finishes are complete.
Point | Details |
Prewire before drywall | Running cable and conduit at rough-in avoids retrofit costs that run several times higher. |
Choose Cat6A as default | It supports 10-Gigabit over full 100-metre runs and future PoE++ devices for marginal extra cost. |
Compliance is non-negotiable | Mains work needs a licensed electrician; communications cabling needs an ACMA-registered cabler under AS/NZS 3000:2018. |
Document everything before walls close | Label, photograph, and test every run, then hand over a cable schedule and patch-panel map. |
Coordinate trades on one build schedule | Yorcon integrates electrical coordination and prewiring into the project timeline to avoid rework. |
Table of Contents
Why smart home prewiring still beats wireless for fixed devices
A wired backbone gives you stability and bandwidth headroom that wireless simply can’t match for anything fixed in place. Wi-Fi signals lose strength through brick, steel stud frames, and even thick masonry, and that attenuation gets worse the further a device sits from the router. Add in latency from congested 2.4GHz channels and interference from neighbouring networks, and you’ve got a recipe for a smart TV that buffers or a security camera that drops frames at the worst moment.
Devices that should always get a cable run: 4K and 8K televisions, PoE security cameras, ceiling-mounted Wi-Fi access points, projectors, AV rack equipment, and any zoned speaker system. Structured wiring consistently outperforms mesh Wi-Fi for exactly these fixed, high-bandwidth loads, because a cable doesn’t care what’s happening on the channel next door.
Wireless still has its place. Battery sensors, mobile devices, and anything that moves around the house don’t need a wall socket. But if a device sits in one spot and streams video or audio, wire it.
Pro Tip: If your build uses a steel frame or double brick, budget for at least one extra WAP drop per level. Those materials cut Wi-Fi range far more than timber frame construction, and retrofitting a ceiling cable after plaster is a genuinely miserable job.
What should you prewire in each room?
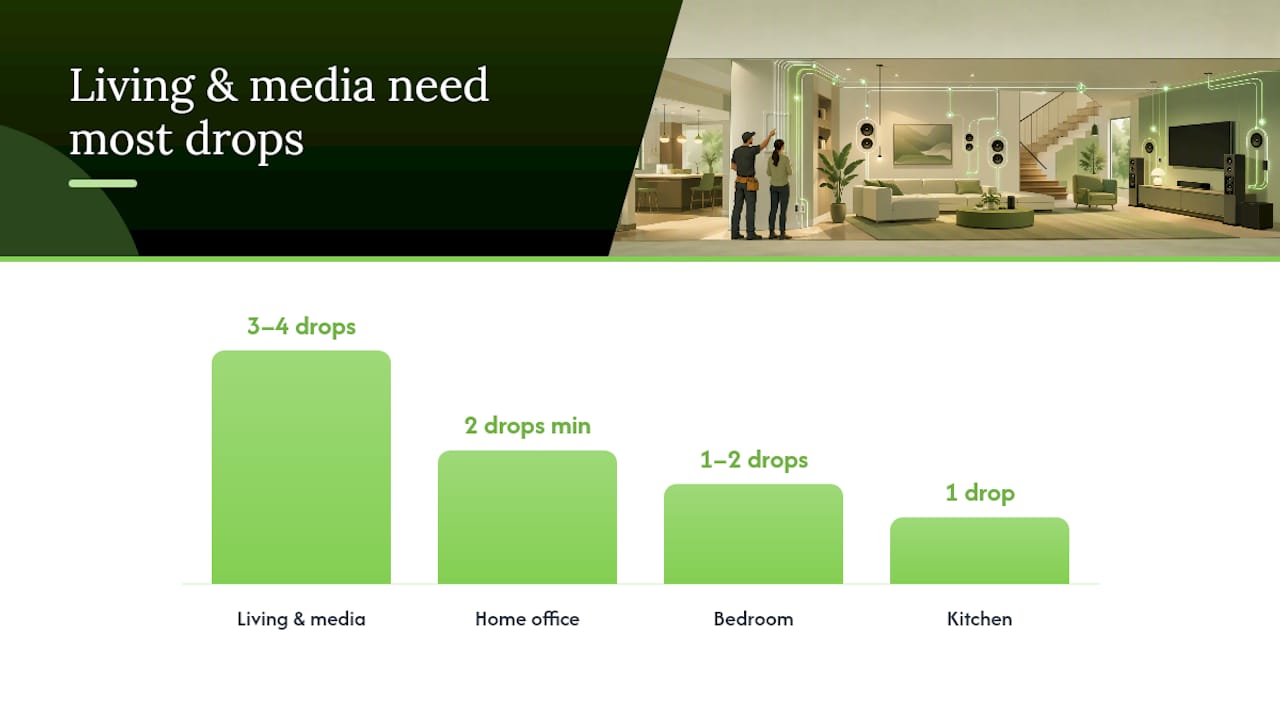
Plan on one to two data drops in every main room as a baseline, with extra drops wherever devices cluster, such as media rooms, home offices, and TV walls. This is the room-by-room map worth marking on your plans now.
Living and media room: 3–4 Cat6A drops behind the TV location plus RG6 coax, speaker cable to any surround zones
Bedrooms: 1–2 Cat6A drops near the bed head and desk
Home office: 2 Cat6A drops minimum, more if you’ll run a desktop and a docking station
Kitchen: 1 data drop for a smart hub or wall-mounted display
Alfresco and outdoor areas: weatherproof conduit for a speaker zone and a camera run
Garage: conduit to the switchboard for a future EV charger, plus a data drop if you’ll run a network switch there
Eaves: Cat6 to every planned camera position, run before the fascia goes on
Front gate or intercom: dedicated Cat6/PoE run back to the cabinet
Ceiling WAP locations: Cat6 with PoE, spaced so no living area sits more than one room away from an access point
Melbourne builders commonly run Cat6 to eaves for cameras, multiple drops to every TV wall, and a neutral wire in each light switch box so future smart switches can be added without rewiring the wall. That neutral wire costs almost nothing at rough-in and is a real headache to add later.
Use case | Recommended cable | Location | Conduit note |
TV wall | Cat6A + RG6 coax | Behind mounting point | Not required, direct run |
Ceiling WAP | Cat6 (PoE) | Hallway/central ceiling | Conduit through roof space |
Security camera | Cat6 (PoE) | Eaves, gate | Conduit to exterior cladding |
Speaker zone | 14/16 AWG speaker cable | In-wall or in-ceiling | Not required, direct run |
EV charger | N/A (power only) | Garage/carport | Conduit to switchboard |
Every run gets labelled at both ends, photographed before the wall closes, and logged on an as-built cable schedule. That single document is what makes your smart home setup guide-worthy years from now, when you’ve forgotten which port goes where.
Which cable and standard should you actually use?
Choose Category 6A for most new builds where the budget allows, fibre for long backbone runs or the boundary handover point, RG6 coax for legacy TV needs, and speaker cable sized to the run length. That’s the short answer. Here’s why it holds up.
Cat6A supports 10-Gigabit speeds over the full 100-metre run and handles the extra power draw of PoE++ devices that are only just reaching the market. Standard Cat6 is cheaper and fine for shorter runs or lower-bandwidth needs, but it starts to lose 10-Gig capability past around 55 metres. The price difference per metre is marginal enough that Cat6A is generally the smarter default, especially anywhere you can’t easily get back in later.
Cable type | Best use | Key advantage | Consideration |
Cat6 | Short runs, standard devices | Lower cost | 10-Gig limited to ~55m |
Cat6A | Long runs, future-proofing | 10-Gig over full 100m, PoE++ ready | Slightly thicker, costs marginally more |
Fibre (single-mode) | ISP handover, long backbone | No distance/interference limits | Needs media converter or fibre-ready gear |
Fibre (multimode) | In-house backbone | High bandwidth over medium distance | Overkill for most residential runs |
RG6 coax | Legacy TV/antenna | Compatible with existing pay TV setups | Being phased out for pure IP video |
Speaker cable (14/16 AWG) | Zoned audio | Matched to amplifier and run length | Longer runs need heavier gauge |
For anything longer than a typical suburban block, or if you’re bringing your own fibre to the boundary, run single-mode fibre and size your conduit generously so it can accept fibre later even if you don’t need it now. Everything you specify on plans should reference AS/NZS 3000:2018 for the electrical side and confirm that communications cabling is installed or tested by an ACMA-registered cabler.
Pro Tip: Run two spare data drops and one spare empty conduit per level, even if you can’t name a device for them yet. It’s the cheapest insurance in the entire build.
Where should your comms cabinet and conduit go?
Pick a conditioned, accessible location with ventilation, room to work, and a dedicated power circuit nearby. Avoid an uninsulated exterior wall or the roof cavity. Heat shortens the life of switches and network gear fast, and a cabinet you can’t reach without a ladder won’t get maintained.
Inside the cabinet, you’re planning for:
A plywood backboard, not just a plastic enclosure, so you can mount and re-mount gear
A labelled patch panel with 6-foot service loops on every termination
Space for a PoE switch, a small UPS, and surge protection
Clear ventilation gaps, not a sealed cupboard
Run one to two dedicated conduits from the attic and one to the exterior perimeter back to this cabinet, plus a clear path to the NBN or ISP entry point. Pull strings go in every conduit, spare ones included, so a future contractor can draw new cable through without cutting into a wall. Size the cabinet with extra depth. You’ll want room for an amplifier, a second switch, or a battery backup down the track, and a cramped cabinet is one of the more common regrets we see in a rushed rough-in.
What compliance rules apply to smart home electrical setup?
Mains electrical work must comply with AS/NZS 3000:2018, the Wiring Rules, and only a licensed electrician can carry it out. Communications cabling needs an ACMA-registered cabler where it connects to carrier services. This isn’t a suggestion. It’s the legal baseline for anything touching your switchboard or your NBN connection.
Before your trades leave site, insist on:
RCD or RCBO protection on circuits feeding an EV charger or other major load
A dedicated circuit for the network cabinet, not shared with general power
Correct earthing on every new circuit
Written documentation confirming compliance, plus test reports for cabling runs
As-built drawings showing exactly where each circuit and cable run sits
AS/NZS 3000:2018 sets the safety, construction, and verification requirements for wiring systems across the country, and it draws a hard line between mains work and extra-low-voltage cabling. Keep both jobs clearly scoped in your contract so nobody assumes the other trade covered it.
What are the on-site rules that prevent costly mistakes?
Label every run, photograph every installation, and test continuity before the plasterer arrives. That order matters. A cable that isn’t labelled and photographed before drywall might as well not exist when something needs troubleshooting in three years.
Certify structured cabling runs and keep the test reports on file
Test PoE devices for correct power delivery, not just data continuity
Document a patch-panel map that ties wall-plate IDs to specific ports
Build a prewire punchlist into your builder’s contract scope, not a verbal agreement
Schedule one pre-drywall walk with the electrician, builder, and low-voltage contractor together
Require spare conduit and pull-strings as a written line item, not an assumption
During the rough-in walk, test every ethernet run for continuity and pair integrity and photograph both ends. At handover, insist on one PDF that combines the cable schedule, port assignments, and photos. That single document saves hours of guesswork the first time you need to add a device.
Pro Tip: Ask for the patch-panel map before final payment, not after. It’s leverage you lose the moment the invoice is settled.
How much does prewiring cost and how long does it take?
Prewiring during rough-in is far cheaper than retrofitting after finishes, and the gap only grows the more finished your home already is. A minimal prewire package can sit under $2,000, while a full Cat6A, camera, and speaker prewire across a larger home can run into the mid five figures. Retrofitting the same scope after walls are finished typically costs three to five times more.
Cost drivers worth budgeting around:
Number of Cat6A versus Cat6 drops specified
Number of camera and speaker runs
Length and complexity of conduit routes
Cabinet fit-out, including switch, UPS, and surge protection
Local labour rates for the electrician and low-voltage contractor
For a mid-sized home, expect the low-voltage rough-in itself to take one to two days, timed to run alongside the electrician’s own rough-in rather than as a separate visit. Coordinating both trades on the same site day is one of the simplest ways to avoid a scheduling gap that pushes your build back a week.
How does a builder actually coordinate all this on-site?
A coordinated prewire keeps the schedule on track and avoids the costly rework of reopening a wall for a cable nobody thought to run. On a Yorcon project, that starts with locking in the cabinet location during design, before a single stud goes up, then booking the electrician and low-voltage contractor for the same rough-in window so neutral wires, conduit, and data drops all go in together.
The trade-offs a builder weighs are the same ones you’re weighing at home: cabinet location against ventilation and noise, extra data drops against budget, and additional conduit runs against how much future-proofing actually makes sense for that household. Every decision gets photographed and logged before the wall closes, because a missed run found after handover costs everyone time and money.
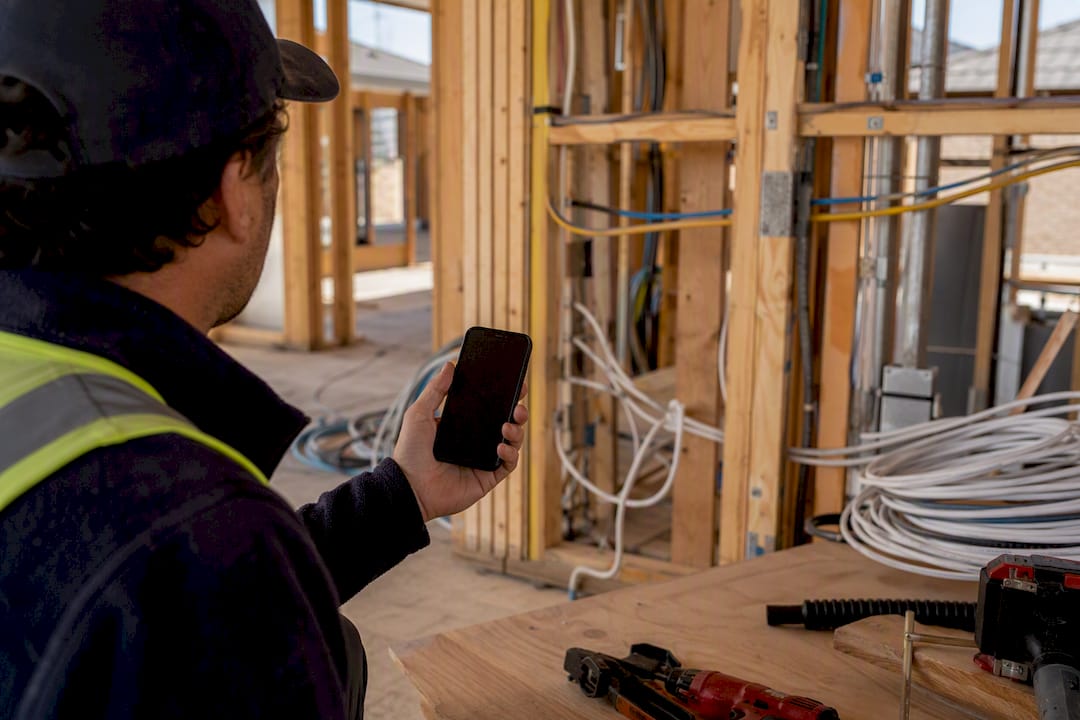
Matthew, who leads Yorcon’s project delivery, has spent close to two decades managing exactly this kind of trade sequencing across Melbourne renovations and new builds, and treats the pre-drywall walk as non-negotiable on every job.
What security steps protect a wired smart home network?
A wired network is inherently harder to intercept than Wi-Fi, since there’s no signal leaking past your property line for someone to sniff from the street. That advantage disappears if the network itself isn’t segmented properly.
Split your network into at least two VLANs at the switch level: one for trusted devices like computers and phones, and a separate one for IoT devices such as cameras, doorbells, and smart plugs. If a cheap camera gets compromised, it shouldn’t have a path to your laptop or your NAS. Most managed PoE switches capable of running a structured cabling setup support VLAN tagging, so this costs nothing extra if it’s specified at purchase time rather than added later.
Physically secure the cabinet itself with a lockable enclosure, particularly if it sits in a garage or a semi-public part of the house. Anyone with five minutes of unsupervised access to an unlocked patch panel can plug in a device that bypasses your firewall entirely.
Change default credentials on every network device before it goes live, not after the family starts using it. Keep firmware updated on switches, access points, and the router, since these are the devices attackers target first precisely because homeowners forget they exist. Finally, keep your as-built documentation somewhere secure but accessible. A wiring diagram is useful to you and useless to almost anyone else, but it’s still worth keeping off a shared public drive.
How should cable routing avoid interference and damage?
Keep low-voltage data cable at least 300mm away from mains power runs wherever they run parallel, and cross power lines at a right angle rather than alongside them if a crossing is unavoidable. Electromagnetic interference from a nearby power cable can degrade a Cat6 signal enough to cause intermittent dropouts that are maddening to diagnose after the wall is closed.
Avoid running cable through areas prone to moisture, such as alongside plumbing lines or through uninsulated exterior cavities, without proper conduit protection. A cable jacket isn’t waterproof, and a slow leak years later can silently kill a run you’ll only discover when a device stops working.
Support cable properly through wall cavities and ceiling spaces using cable ties or J-hooks rather than letting it rest directly on ceiling insulation or ductwork, where the weight of insulation over time can crush the cable’s internal pairs. Never staple directly through a cable jacket. It’s a common shortcut on tight schedules and one of the most common causes of intermittent faults found during testing.
Leave a service loop of slack at both ends of every run, and avoid tight bends. Cat6 and Cat6A have a minimum bend radius, and kinking the cable around a sharp stud corner can permanently damage the internal pair twist that makes the cable perform at rated speed in the first place.
How do you coordinate electricians, builders, and network specialists?
The biggest source of missed prewiring isn’t a bad decision. It’s a gap between trades who each assume the other one covered it. The fix is a single, shared punchlist that names exactly who runs what, checked off at a joint site walk before drywall.
Get the electrician, the low-voltage or network specialist, and the builder’s site supervisor on-site together at least once during rough-in framing. This is the point where conduit paths, cabinet location, and switch-box neutrals all still have easy access, and where a five-minute conversation avoids a costly reopening later.
Put the prewire scope in writing as part of the builder’s contract, not a verbal add-on between the homeowner and a separate low-voltage contractor. When Yorcon manages the full building process, that coordination sits inside the existing project schedule rather than as a bolt-on that has to be chased separately.
Finally, agree on a single point of contact for approving changes. If the homeowner wants to add a data drop mid-build, that request should go through the site supervisor, not straight to the electrician, so the network specialist and builder both know it happened and can adjust conduit or cabinet capacity accordingly.
Smart home prewiring for future-proofing: what matters most
The conventional advice on this topic treats prewiring like a shopping list: run this many Cat6 drops, buy this cable, done. That undersells the actual decision, which is really about how much slack you build into a plan for technology you can’t specify yet. A tailored prewire based on how the household actually lives beats a generic checklist every time, because the family that streams from three home offices needs a very different cabinet than the family with one media room and a nanny cam.
Where most guides fall short is treating conduit as an afterthought. It’s the cheapest line item in the entire prewire, and the one homeowners regret skipping more than any cable choice. Compliance with AS/NZS 3000:2018 and proper documentation aren’t box-ticking exercises either. They’re what makes a home sellable and serviceable a decade from now, when the original electrician has retired and someone else needs to make sense of your walls.
If you take one thing from this guide, prioritise the cabinet location and the spare conduit before you argue over Cat6 versus Cat6A. Get those two decisions right and almost everything else is fixable later.
How Yorcon builds prewiring into your renovation or new build
Yorcon integrates design, electrical coordination, and prewiring into the rough-in schedule so you’re not paying retrofit prices two years after moving in. Rather than treating low-voltage cabling as a separate job you have to chase down and manage yourself, it becomes one line item inside a build that’s already being project-managed from permits through to handover.
When Yorcon manages your prewire, you get marked-up plans showing every data drop and conduit run, a properly installed and labelled network cabinet, and a documented handover pack with photos, test reports, and a cable schedule you can actually use. If you’re planning a home extension or a full home renovation in Melbourne, ask to have prewiring included in your build scope from the design stage rather than added as a change order once walls are already framed. Request a prewire consultation before your contract is signed, and it becomes one coordinated decision instead of three separate headaches.
Sources
Recommended


